Sunday Project: Force.com Spring app on Heroku
In this article, I will be using:
- Ubuntu 12.04
- Java 1.6 - OpenJDK Runtime/IcedTea6 1.11.5 (installed before, not sure of source)
- Eclipse Indigo (installed before, not sure of source)
- Eclipse Heroku Plugin 1.0.1
- Git 1.7.9 or Eclipse eGit Plugin 1.3
I will be following this tutorial, which was presented at Dreamforce 2012. This training session was wonderfully presented by Anand B Narasimhan @anand_bn and Richard Vanhook @richardvanhook. I wanted to condense this 2+ hour session into just the steps required to make a Spring app on Heroku.
Update: I added the resulting code into a public repository on GitHub for your reference.
(Note: This article was my first attempt at using markdown as a formatting engine. I grabbed the HTML and pasted it into Blogger, then fixed some spacing. Markdown limits you to six choices for headings, bullet point and number lists, and horizontal rules, so it's kinda restrictive. At this time, I'm not sure how to format this article better, so any tips would be nice.)
What I learned, and what you may also gain from this article:
- The Heroku Eclipse plugin greatly simplifies creating/developing Heroku apps.
- Project templates are gold, and save hours of frustration and configuration.
I have been horrified by the time required to go from an empty project to a working application in Java. - Embedded web container seems like a great idea. If system/environment admins don't have to set up the web server, there is less risk for failure when deploying to different environments. Moving one thing is so much easier than moving two things and ensuring they cooperate.
- The project template uses a Java library called RichSobjects for talking to Salesforce. I haven't heard of this library before, but I'm making a mental note to check it out later if I need a Salesforce API library.
Prerequisites
- Install the Eclipse Heroku Plugin
- Official Heroku guide. But I will detail the steps here, also.
- Link to the plugin binaries by going to Help > Install New Software and clicking Add.
- Name = Heroku, Location = https://eclipse-plugin.herokuapp.com/install and follow prompts.
- To set up the plugin, go to Window > Preferences and find the Heroku section on the left.
- You will need a Heroku account, which is free. I made an account by using this wizard.
- Get a Heroku API key by entering your Heroku credentials in the Email and Password fields and clicking Login.
- The Heroku Plugin found my SSH key, because it is in a default location. If it's empty, follow the Heroku guide above to generate a public/private RSA key pair. Then return to the Heroku settings in Eclipse to generate an SSH key.
Create new Heroku app
- Note: You can import an existing Heroku app by going to File > Import and selecting Heroku.
However, I will be creating a new app through Heroku. - Tell Eclipse to set up a new Heroku project for you by going to File > New > Project...
and select the Create Heroku App from Template. - Select Force.com connected Java app with Spring,OAuth and leave Application Name blank, as this name must be unique across all Heroku apps. If it's blank, Heroku will create a cool name for you.
- This sends a request to Heroku to set up an app for you and puts all the code in a git repository that Heroku manages.
- Eclipse will clone this Git repo locally and expose it as an Eclipse project.

Inspect what we have
- This is a Maven project, so look at
pom.xmlto see dependencies:
- Spring
- spring-context
- spring-webmvc
- jstl
- standard
- javax.servlet-api
- Salesforce
- richsobjects-core
- richsobjects-api-jersey-client
- richsobjects-cache-memcached
- force-oauth
- force-springsecurity
- Tomcat
- webapp-runner
- Logging
- jcl-over-slf4j
- slf4j-simple
- Spring
There are many code files and settings files in this project, so it's hard to see what's going on. This is different from Force.com applications, in which only code is exposed to the developer, and settings are normally in the environment and changed in the UI. So, instead of looking at each component of this Java application, we are going to look at code at just the highest-level.
- To see code that calls Force.com, see
ContactController.java:
- Class annotations (
@Controllerand@RequestMapping) are part of the Spring framework. These
instruct the framework where to inject framework code at runtime. This keeps code clean. - This class uses the RichSobjects library to interact with Sobjects in a Salesforce database
by using the Partner API.
- Class annotations (
- To see the HTML page template we will request, see
contacts.jsp:
- Pretty simple: it's HTML which has JSP tags, which the HTTP request handler will resolve into HTML for the user.
- To see global variables for the Spring app, see
applicationContext.xml:
- Most values are hard-coded in this file. However, look at lines 29-33 to see yet-unresolved values. These values will be drawn from the Heroku environment, I believe.
<fss:oauth logout-url="/logout" default-logout-success="/">
    <fss:oauthInfo endpoint="http://login.salesforce.com"
                   oauth-key="#{systemEnvironment['SFDC_OAUTH_CLIENT_ID']}"
                   oauth-secret="#{systemEnvironment['SFDC_OAUTH_CLIENT_SECRET']}"/>
</fss:oauth>
- Most values are hard-coded in this file. However, look at lines 29-33 to see yet-unresolved values. These values will be drawn from the Heroku environment, I believe.
- Where is Tomcat?
- Heroku uses idea of an embedded web container. Instead of running a web deamon as an OS process, and the Java app as a separate OS process, we unify the two pieces. We can instantiate the Tomcat web server from our Java program, using a Java wrapper called
webapp-runner. webapp-runnermakes app deployment and app start very simple.- Jetty is another web server that is popular to use as an embedded server.
- Heroku uses idea of an embedded web container. Instead of running a web deamon as an OS process, and the Java app as a separate OS process, we unify the two pieces. We can instantiate the Tomcat web server from our Java program, using a Java wrapper called
- How to start our app?
Procfilehas a command that Heroku can call to starts an application.
web java $JAVA_OPTS -jar target/dependency/webapp-runner.jar --port $PORT target/*.war- (process name) (command to execute)
- Can have multiple processes - e.g. web, worker, and clock
- Navigate to app on Heroku
- Find the name of your app, which we allowed Heroku to decide. If it was
funny-name-1234,
navigate to this URL to see that the app is already running on Heroku:
funny-name-1234.herokuapp.com
- Find the name of your app, which we allowed Heroku to decide. If it was
Set up local build for OAuth
This application is currently set up to use OAuth to gain access to data in a Salesforce org. By default, Salesforce will not allow OAuth applications to request access, so we have to add an exception, that is, define an accessible application.
- To allow an external application to request access to a Salesforce org:
- Login in to the Salesforce org to which you want to connect.
- To allow an external application access, go to Setup > Develop > Remote Access.
- Click New.
- Choose any name in the Application field for this record. I chose
Heroku Local. - Choose any email for Contact Email field.
- Use
http://localhost:8080/_authfor the Callback URL field. - Click Save.
- Navigate to the detail view of this Remote Access record to see that Salesforce
generated a Consumer Key and a Consumer Secret.
- To set up our project to run locally in Eclipse, instead of only on Heroku:
- Set up a Run configuration by going to Run > Run Configurations...
- Select Java Application from the list on the left and click the plus icon at the top of this list.
- Choose a name for this Run configuration. I chose 'web app runner'.
- Enter your project name in the Project field, which looks like
funny-name-1234. - Choose the main class for the Main Class field, which is
webapp.runner.launch.Mainfor this project. - Go to the Arguments tab, and enter
src/main/webappin the Program Arguments field. - This application uses environment variables for OAuth. We will specify this at run-time by going to the Environment tab. This app is expecting two keys, "SFDC_OAUTH_CLIENT_ID", and "SFDC_OAUTH_CLIENT_SECRET".
- Click New.
- Name =
SFDC_OAUTH_CLIENT_ID - Value = (value of Consumer Key field from Remote Access record we just created)
- Save this and click New.
- Name =
SFDC_OAUTH_CLIENT_SECRET - Value = (value of Consumer Secret field from Remote Access record we just created)
- Save this.
- Click Run.

After performing these steps and pressing Run, the application should be running locally on port 8080.
We can see this by navigating to the
http://localhost:8080 URL in a web browser. To check that our OAuth has been set up correctly, navigate to http://localhost:8080/sfdc/Contacts URL. The app will redirect to a Salesforce authentication page, where you should click Allow. You will then be redirected back to the same URL in your authentication.Setup Heroku app for OAuth
We added run-time variables to our environment by adding them to the Run Configuration in Eclipse.
To add these variables to our app when it is running on Heroku, we must add them to another settings
location in Eclipse that gets pushed to Heroku.
- Add another Remote Access record to the Salesforce org:
- Login in to the Salesforce org to which you want to connect.
- To allow an external application access, go to Setup > Develop > Remote Access.
- Click New.
- Choose any name in the Application field for this record. I used the name of
Heroku app,Heroku Funny Name. - Choose any email for Contact Email field.
- Use
https://funny-name-1234.herokuapp.com/_authfor the Callback URL field. - Click Save.
- Navigate to the detail view of this Remote Access record to see that Salesforce
generated a Consumer Key and a Consumer Secret.
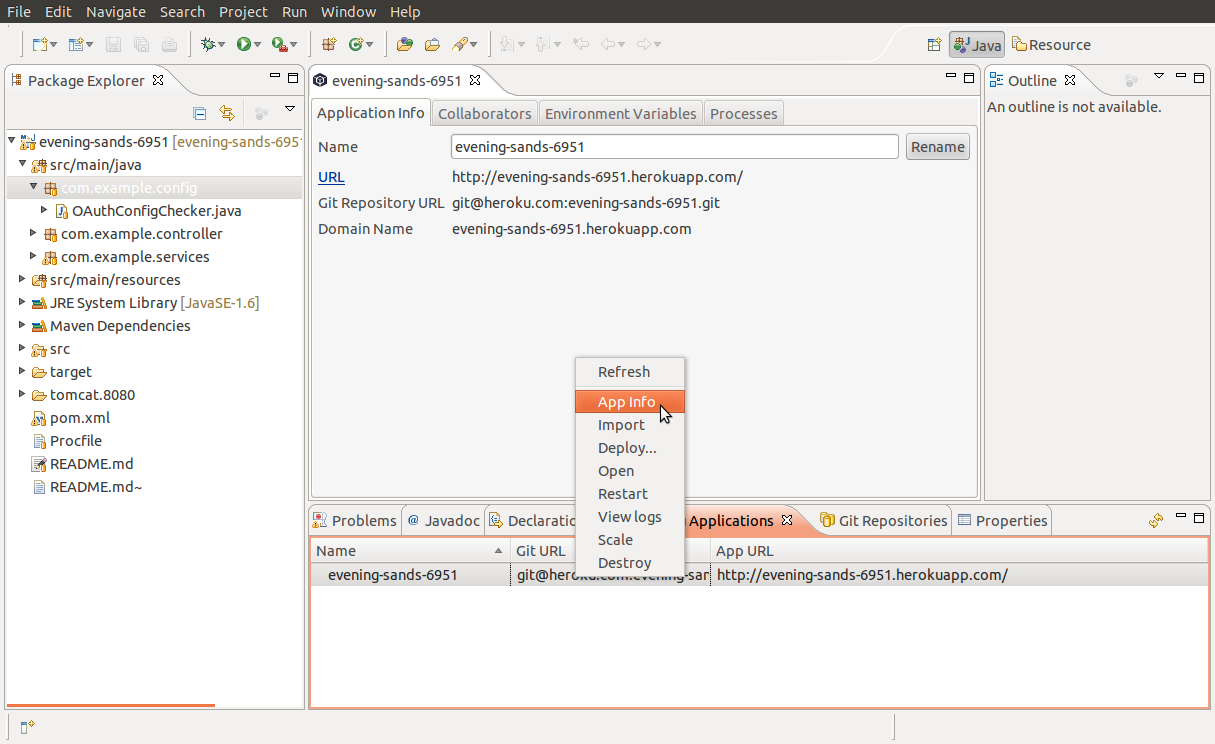
- Open the Heroku settings for this Heroku project:
- In Eclipse, click Window > Show View > Other...
- Choose My Heroku Applications.
- Right-click on your application in this view, and select App Info.
- To add new environment variables to this Heroku app, choose the Environment Variables tab
from this file.
- Click the + button on the right.
- Key =
SFDC_OAUTH_CLIENT_ID - Value = (value of Consumer Key field from Remote Access record we just created)
- Save this and click New.
- Key =
SFDC_OAUTH_CLIENT_SECRET - Value = (value of Consumer Secret field from Remote Access record we just created)
- After adding these environment variables, the Heroku app should be immediately updated to
reflect the values. If you navigate to the Contacts URL of your Heroku app,
funny-name-1234.herokuapp.com/sfdc/Contacts, you can see that the OAuth is now working.
Add New Feature to Your App
To show how to add a new feature to the app, we will be adding a link to each contact's Twitter
handle. Follow these steps to add this new feature.
- 1) Add a new custom field to the Contact object:
- Login to the same Salesforce org.
- Go to Setup > Customize > Contacts > Fields. Click New and create a new text field
calledTwitterHandle__c. - Save this.
- 2) Query this field in our local copy of the Java project:
- In Eclipse, open ContactsController.java.
- In the
listContactsmethod, addTwitterHandle__cto the Select clause of the query. - Save this file.
- 3) Expose this field value in the JSP page:
- In Eclipse, open contacts.jsp.
- Add a new header column to this table by adding
<th>Twitter Handle</th>to line 13,
underneath the Email header. - Expose the field value in the table cells by adding
<td>${contact.getField("TwitterHandle__c").value}</td>
to line 27, underneath the similar row for Email. - Save this file.
- 4) Test this change in the local build of the project:
- Stop the server by opening the Console view in Eclipse and clicking the red stop button.
- Run a new build, which will have our Twitter handle column in the Contacts page by clicking
the Run button underneath the toolbar, which looks like a green arrow. - Navigate to the URL for this local page, which should be
http://localhost:8080/sfdc/contacts.
- 5) To commit these changes locally:
- Right-click on your project in the Package Explorer in Eclipse, select Team > Commit.
- Add a commit message which describes the changes, and click Commit.
- 6) To push these local changes to our Heroku repository:
- Right-click on your project in the Package Explorer in Eclipse, select Team > Push to Upstream.
Managing Your App
- Check status of app
- Go to My Heroku Applications view in Eclipse.
- Right-click on one of your apps, and click View Logs to see last 1500 log lines
for your app in production. - Heroku made a thing called "Logplex". All messages that your app produces can
be accessed here. You can find third-party apps to derive information from these logs.
- Scale your app up and down
- Free dev accounts have only one dyno.
- To scale app to >1 dynos, must tie money to account, for example, by joining
app to Heroku org with money. - Right-click on one of your apps in My Heroku Applications, click Scale and choose 3.
Your app is now on a 3-node, load-balanced cluster.
- Add collaborators
- Go to My Heroku Applications in Eclipse and click App Info.
- Go to the Collaborators tab to see all other users in your Heroku organization.
- Either select one of these users or click the plus button on the right to add by email.
Good post Alex.
ReplyDeleteAny thoughts on Heroku vs Amazon Beanstalk (if u used) on following points (for Java)
- Ease of deployment
- Multi-developer working on same project
Hey Abhinav, I haven't used Beanstalk yet, so I don't know how to deploy apps to it. I believe you just supply a WAR file, which makes deployment dead-simple. On the other hand, Heroku deployments involve pushing raw code to its repository, which is equally dead-simple. That said, only real-world experience can show us the whole story.
ReplyDeleteMulti-developer working on same project? My heaviest development experience is on Force.com platform. The only reason it is hard to do multi-developer development on Force.com is because each developer can *not* create a local version of the app. Well, that's not true; each developer *can* buy a Saleforce sandbox for that org, but this becomes prohibitively expensive as you add more developers.
Both Heroku and Beanstalk allow you to run your app locally, since the only dependency is a JVM. Because of this, each developer can have a Git repo, develop on their own machine, and push only working features to a shared repository for internal testing and feature integration.
This comment has been removed by a blog administrator.
ReplyDelete